Showing posts with label baking. Show all posts

Tuesday, February 17, 2015

Romancing a simpler time - Pear and Cheese Bread


It was the year 1999. I was studying in Chennai and my then boy-friend was supposed to visit me for a day. All I knew was that he said he would meet me at my hostel bus stop in the morning. Taking into consideration his estimated arrival time, how long he would take to drop his stuff off at his friend’s house, freshen up, and then reach my hostel, I figured it would be 9am. So I waited patiently.

8.30am – What if he arrives early?  I skipped breakfast and rushed to the designated meeting place. Giddy with the promise of romance.
9.30am – Still waiting with mounting excitement.
11.30am – Excitement turned to severe butterflies in my stomach. Probably the result of a hungry stomach.
1pm -  Tears and trepidation. My heart beating faster every time I saw an auto pass by. Feeling conscious of the many people who kept looking at me wondering why I had been sitting at the same bus stop for the past many hours.  
1.30pm – Nervous wreck.
And finally when he walked up to me a good 5-6 hours after the appointed time apologizing profusely about a bus break down… well I’m not going into how that story ended. Because that is not the point here.

The point is, there was a certain drama and romance to not having cellphones, not having every minute and second mapped out, of not tracking someone’s every move by the hour. Yes it could be frustrating, but we knew no other way and I believe the love stories of those decades were so much more a by-product of destiny because of that.

Destiny. Love. Back to basics. A simpler time. Bread.

Monday, November 18, 2013

Just a little cuckoo...err... cookie!

I have too many passions in life. Some are temporary, some are permanent, and I tend to get obsessive about all of them. As the long silence on the blog indicates, my passion for blogging has now taken a slight back seat. Not the cooking obsession, that’s been diagnosed as permanent. But the reading up of food blogs till 3am, surfing and bookmarking websites and recipes, thinking up of funny posts to go with all my recipes - all of that has waned a bit... hopefully temporarily.

My latest obsessions are TV shows (have been for a while now), and this one film called Ram-Leela. That’s a story for another day, but suffice to say that all my free time in the past few months was spent planning my life around Ram-Leela (or "Goliyon ki Raas Leela - Ram Leela" as its now called). But this past Friday the movie released, and all of you who read this blog will go watch it and send best wishes our way (even though you may not know why, but hey, I believe in unconditional love and the power of positive thinking!).


So that leaves us with the TV shows. Which I think I have a handle on. I just need to watch “The Good Wife” every Sunday, “The Vampire Diaries”, “Scandal” and “Greys Anantomy” every Thursday, “The Originals” every Monday and oh, catch up on Downton Abbey, Homeland, White Collar and Masterchef Australia :) That’s do-able, right? I mean I haven’t even put Criminal Minds, Elementary and The Blacklist in the list... which I watch whenever I am bored. So those don’t really count, do they? Ok, don’t answer that :/

All I am trying to say is that I'm going cuckoo balancing too many things and so I deserve a cookie. And now that all of you stuck around to read my crazy rants, here is your cuckoo.. err... cookie reward.

Friday, March 8, 2013

3rd Blogoversary with Pumpkin-Choco chip "In-betweeners"!

I’m an In-betweener. At any given point in time, I am, in my head,  in between complete chaos and total order. I have an innate desire to have things under control – I nag and bug people around me and work myself into a frenzy till all the things to be done, are done. Then I experience a few days of smug satisfaction.

And then I go back to worrying about all the disorder that keeps growing around me. Coz didn't you know? Order breeds disorder! Balance of nature and duality of universe and all that shit.

So the 3rd anniversary of this blog came and went by... and as usual, I was in the middle of too much chaos to actually write a post on that day. 
 

But that’s ok, because this blog understands. The Weekend Epicurean came about as a result of my being an “In-betweener”. I was in-between houses, my finances were a mess, I hated my job, didn’t know where life was headed and I had no clue what I wanted to do 5yrs from then!
Then I started the blog, shifted to a new house, quit my job, took a year-long break, swore to shift careers, and then went back to the same career. Yeah. Well. Oh, and did I mention I still don’t know what I want to do 5yrs from now?

Yup, somewhere in between all this change and constancy, this blog continues to breathe and grow. Albeit a bit slowly and lazily, but it survived nevertheless.

Tuesday, August 2, 2011

A wonderful Sunday & Plum -Cherry Cobbler to round it off...

I had a fantastic weekend! Erm... even though my whole weekend constituted of just the Sunday. Now that I’m back at work and have only alternate Saturdays off, Sundays just whizz by. By the time I’m up and awake half the day is gone… and then by the time I catch up on all the newspapers with their weekend supplements and magazines, sort out the house, and plan the meals, the rest of the day is gone too! But this Sunday, we decided to go to town for lunch to celebrate Sid and his writing partner G finally taking a break from the crazy world of Television writing.
Now those who are familiar with Mumbai will know that for us suburbanites, going to town is an event. On weekdays with the kind of crazy traffic there is, going to town, i.e. South Mumbai, takes almost 2-3hours! And that for an actual distance of about 30-40kms… But on Sunday, the roads are empty, the drive is lovely and you begin to understand why ‘town’ is all that it is made out to be.

Just after crossing the Bandra-Worli sea link... overladen sky above and swirling waters below!


Tuesday, March 8, 2011

Whole Wheat Chocolate Chip Muffins

Phew! First of all, thank you everyone for the many many comments on my First Anniversary post. I was honestly overwhelmed and elated that so many people liked the madness that spilled onto that post. Sometimes my craziness and tendency to be dramatic have to be reigned in... I think I might genuinely scare people off otherwise :D So after the Film Food post, I wanted to blog about something that matches up to it, if not in terms of zaniness then sheer scrumptious-ness at least! So I decided to bake some muffins for the first time. My friend SM gifted me a Muffin Tray long ago along with assorted baking goodies and equipment. But it has taken me months to finally get around to baking some muffins in the tray. One of the main reasons was that I didn't have muffin tray liners. In fact I still don't have any :( It's just that there is no store near my house that stocks any baking paraphernalia and I'm too lazy to travel 30km to Crawford Market to buy stuff. So these Chocolate Chip Muffins finally got made without liners and were none the worse for it :)

Friday, December 3, 2010

Least sinful holiday dessert - Apple Crumble


I'm on holidayyyyyyyyyyyyyyyyyyy!!!! :) No, not on the sun-kissed beaches of Goa or some such exotic destination, but in my home town - Vishakhapatnam, or Vizag as its popularly known. But yes, it does have more than its share of beautiful beaches and hills, and its home. I'm getting to spend an entire month at home, and more importantly with mom after 3 whole years! So this is my first proper 'Maayka' visit after my marriage.... And that's the reason I haven't blogged in a while :)

Monday, November 8, 2010

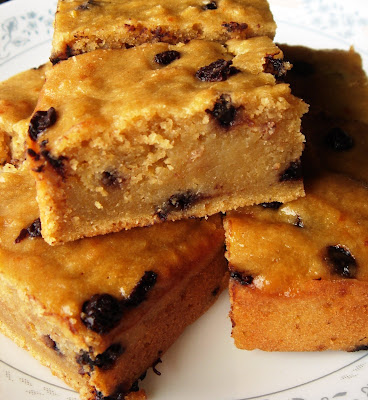
Blonde is Beautiful - Pumpkin and Chocolate Chip Blondies

Not being racist or anything, but these Blondies really are beautiful. If you, like me, have only heard of the more popular darker cousin - the Brownies, then let me tell you these Blondies are just as good. The texture is definitely very different from the crumbly, gooey brownies. Blondies are delightfully dense and a little cake-y, but they are delicious and refreshingly different from anything I have had earlier.


Tuesday, August 24, 2010

The Baking Diaries


It has been almost a month since my last post, and this time I have no real reason behind this delay except sheer laziness. Now I find I have pictures of almost a dozen things I cooked and no posts to show for it! So here's a recap of my baking escapades in the last month...

I started off with another version of the Spiced Carrot Cake, this time with apples and pumpkin. Instead of grating them, I just cut them up into little pieces and folded them into the cake dough. The cake turned out beautifully and the baked pieces of apple and pumpkin were sweet, crunchy and lightly spiced and added a whole new dimension to the cake :) Arundati, I have to thank you for this amazingly versatile recipe!

The next two cakes I baked were adapted from amazing cook, fashionista, housewife, and a dear friend from college who is back in touch thanks to the world of food blogging - The Diary of a disPlaced Housewife.
The first one was her Luscious Mango Cake - which I tweaked into a wonderfully fragrant wholewheat mango and raisin egg-less cake with a home-made cream cheese icing.

MANGO & RAISIN CAKE

Ingredients:


Mango Pulp - 2 1/2 cups (I used fresh ripe mangoes peeled and chopped)
Sugar - 1 cup
Yoghurt/Curds - 1 cup (You can use 2 eggs instead)
Whole wheat flour - 2 cups
Baking Soda - 2 tsp
Salt - 1 pinch
Raisins - 1/2 cup
1 teaspoon Vanilla Extract

Sift together the flour, salt and baking soda and set aside. Preheat the oven to 180 degree C and grease and flour your cake tin. In a mixing bowl, combine the mango pulp, sugar and yogurt/eggs and stir. Now add the flour, raisins and vanilla essence and fold well without overmixing it. Pour this batter into the greased cake tin and bake for 35-40min, till the pick comes clean. Cool on a wire rack before slicing it up.
For the Cream Cheese Icing:


Cream Cheese - 3/4th cup
Butter - 1/4th cup
Powdered Sugar - 1 cup
Vanilla Essence - 1 tsp

I followed Tarla Dalal's amazingly easy Low Fat Cream Cheese Recipe which I'm reproducing below:

Ingredients

1 litre low fat milk

1 teaspoon citric acid crystals

1/2 cup warm water
Method
1. Put the milk to boil in a thick bottomed pan.
2. When it comes to a boil, remove from the flame and keep aside for a few minutes.
3. In another bowl, mix the citric acid crystals with the warm water.
4. Pour this mixture into the hot milk and allow it to stand for about 5 minutes till the milk curdles on its own. Stir gently if required.
5. Strain this mixture using a muslin cloth, leaving some of the whey in the curdled mixture.
6. Blend the drained milk solids in a food processor till it is thick and creamy.
7. Use as required
Tips
If the drained whey is milky, boil it once more and strain the separated milk solids.
You can also use 1/2 tablespoon of lemon juice instead of the citric acid crystals.

Now add the softened butter, sugar and vanilla essence to the Cream Cheese and run it in the mixer on a low speed, and you have a yummy home-made icing ready!
The way I like it:
Spread the Cream Cheese icing over the cooled cake, top with some fresh mango pieces or pulp and serve!
*************************************************************************************
The second recipe that I borrowed from The Housewife was an Orange and Walnut Cake. It sounds all fancy-shmancy, but believe me, it is the easiest of all the cakes I have baked!

EGGLESS ORANGE & WALNUT CAKE
Ingredients:

Brown Sugar - 1 1/2 cups
Butter - 1/2 cup
Yoghurt - 2 cups
Orange Zest - 1 whole Orange
Orange Juice - 1/2 cup
Flour (Maida) - 1 cup
Wholewheat Flour (Aata) - 1 cup
Baking Powder - 3 tsp
Milk - 1/4 cup
Chopped Walnuts - 1/4th cup

Cream the butter and sugar well. Make sure the butter is at room temperature, otherwise you may not get the required creamy consistency. Add the curd/yogurt and beat well. Now mix in the orange juice and orange zest.

Sift the flour and baking soda together and add this to the mixture above, alternating with the milk. Basically start by adding a little flour, then the milk, then the flour again and continue till all the milk and flour has been added. Make sure you are folding the mixture gently throughout this process.

Now add the chopped walnuts and mix gently.

Pour the batter into a greased and floured cake or loaf tin and bake in a preheated oven at about 180 degrees C for 35 min. Check with a knife or toothpick and if it comes clean, turn off the oven and let the cake cool on a wire rack.

The way I like it:
The glossy icing you can see on the slice of cake in the picture above, I must admit, is out of a tin. I used Pillsbury Vanilla Cream Icing that was gifted to me by a dear friend M. It looks gorgeous, doesn't it? But I must say the taste can be a little overpowering. So go easy on the icing if you are using a readymade one.

Just a plain slice of cake with a cup of my favorite Tulsi Sweet Lemon Green Tea makes for a great book-reading snack :)

PS - Ms. Housewife- like you can see, I absolutely love your blog :) keep those amazing posts coming!


Saturday, July 17, 2010

Eggless Carrot & Raisin Cake


And so the baking continues... After the Cookie saga which some of you have been following for the past week, I decided to try my hand at baking a cake. Now I'm loathe to consume too much maida (All purpose flour) and Sid hates the smell of eggs. So I was searching for a good egg-less cake recipe with wholewheat flour when I remembered Arundati's Spiced Pumpkin & Carrot cake.

I followed the recipe from her blog, but did not have pumpkin at home. So I just used 2 cups of grated carrot and 3/4 cup raisins instead. So here is her recipe with the changes I made:

Ingredients:
2 cups whole wheat flour
2 tsp baking powder
1 tsp baking soda
3/4 cup grated jagerry
3/4 cup vegetable oil
4 tbsp yogurt (I used home made curd)

2 tsp Garam masala

1/2 cup orange juice (I used freshly squeezed orange)

Zest of one orange

Salt - 1 pinch
2 cups - grated carrot
3/4 cup - Raisins

Preheat the oven to 180°C. Mix all the dry ingredients in a lrge mixing bowl. Whisk the oil, yogurt & orange juice separately and add to the dry ingredients to form the cake batter. Fold in the raisins and grated. Bake for 35-40 min in a greased baking tin.

The way I like it:
This spiced carrot cake tastes best when served warm. So once its done, let the cake cool a bit on a wire rack, but slice and serve while still warm. Tastes amazing with a scoop of vanilla ice-cream.

The raisins on top got a bit birnt, but otherwise the cake turned out just great and stayed good for 3 days in the fridge.

Thursday, July 8, 2010

2nd attempt at Baking - Super-quick Oatmeal Cookies

Ok, so I know I seem to be on a Cookie overdrive, but haven't you ever had that obsessive compulsion to keep making something till you perfect it? No? Ok then, you have no clue what I'm talking about.

Anyway, I know the post heading says 2nd attempt at baking, but to be honest, the picture you see actually documents my 3rd struggle with cookies. After the Dark Chocolate Cookies which were too bitter and soft for my liking, I got this super simple recipe from my friend SM for Oat and Chocolate Chip Cookies. But in spite of following the directions and measuring all the ingredients meticulously this time, the cookies got burnt to almost a cinder :( I barely managed to save 2-3 cookies and proceeded to gnaw at their tops. Oh what, you don't do that? Well, how else are you going to know if the cookies would have tasted good when not burnt? (You can see 2 of the burnt cookies lurking in the right-hand corner of the photograph.. see, I had even decorated them with colorful Gems in the centre!)

So anyway, I was quite despondent by now and was telling myself I'm no good at this baking thing. So I lolled around depressed, watched an episode of True Blood, called up Sid to check what time he was coming home... and then decided what the hell, let me try it one last time. Of course by now I had run out of chocolate and I had to almost dust out the remaining oats to make sure I had enough. But surprise! Miraculously enough, the 3rd attempt produced wonderful results! :) Don't ask me what I did wrong the previous time. I still have no clue...

Ingredients:

Quaker Oats - 1 cup
Whole wheat flour/Aata - 2/3rd cup
Brown Sugar/Jaggery - 6 tbsp (By my 3rd attempt I had run out of jaggery too, so I just used refined white sugar)
Butter - 3/4 cup
Vanilla Essence - 1 tsp
Almonds - 4-5
Chocolate Chips - Handful

In a mixing bowl take the oats, flour and sugar and mix well. Make sure the butter is warm or at room temperature and add it to the dry ingredients. Pour in the vanilla essence and knead the whole mixture till the butter and sugar seem to have dissolved well. Add the chocolate chips. Refrigerate for 15-20min.

Preheat the oven to 160°C. Brush the baking tray with butter or line it with aluminium foil brushed with butter. Take out the cookie dough from the fridge and scoop out small amounts and place them on the baking try. This recipe should make for around 12 medium-sized cookies or more.

Press in chopped almonds in the centre of each cookie, pop the tray into the oven and bake for 40min. Take out the tray when done and let the cookies cool on a wire rack. Store in an air-tight container.

The way I like it:
Yummy with some hot Tulsi-Jasmine Green tea or a cup of regular chai.

If you look carefully at the picture, you can see one poor pock-marked cookie which was subject to my poking and prodding every 10min... I was that scared of burning this lot too! But thankfully they turned out just fine and were polished off the same evening by Sid and G.

And did I mention that this has given me enough courage to actually bake a carrot cake? Yeah, I did :) But that's for another post another day...

Friday, July 2, 2010

Sinfully-Dark Chocolate Cookies

After much trepidation, hesitation and procrastination, I finally inaugurated the oven in my new cooking range with these seemingly simple Chocolate Cookies. I was really apprehensive about even starting the oven because for one, I have never really baked in my entire life. And two, this being a gas oven and not an electric one, I was just extremely unsure how to operate it successfully...(This in spite of a complete demo from the cooking range representative!).

So after much persuasion on my friend SM's part, including an amazing housewarming gift of a set of baking paraphernalia, I finally steeled myself to give these cookies a try. The recipe is from the Glen Cooking Range manual and recipe book.
Ingredients:

Flour - 1 cup (125 gms)
Butter - 80 gms
Sugar - 6 tbsp (75 gms)
Cocoa Powder - 2/3 cup (75 gms)
Salt - 1/2 tsp
Egg - 1
Baking Powder - 1 tsp

Keep the butter out for a couple of hours before you start baking so that it is at room temperature. Sieve together the flour, salt, baking powder and cocoa powder. Now mix the butter and sugar and keep folding it with a fork or wooden spoon till all the sugar granules melt in and it reaches a creamy consistency. If you have an electric hand mixer, then just cream the butter and sugar together till its soft. Beat the egg and pour it into the flour mixture. Add the creamed butter and sugar to it. Now knead it lightly and add a splash of milk if necessary. Roll out the dough and cut it into rounds with a cookie-cutter or a katori. Now evenly space the cookie dough on a greased baking tray making sure their edges do not touch.

Preheat the oven for 15-20min at 210°C. Place the baking tray inside the oven and bake for 10-15min. Switch off the oven when done and let the cookies cool before transferring them from the baking tray.

Garnish with some toasted almonds and crunch away!


This being my first attempt at proper baking, I got quite a few things wrong. First, I measured the Cocoa powder wrong and ended up putting in more than a 100gms instead of just 75 gms. This made the cookies a little bitter. The dough I kneaded became too runny and I couldn't roll it at all! So I ended up patting little mounds of gooey dough onto the baking tray instead... I think this is because I didn't cream the butter and sugar well.

Anyway, so the end product looks great, but doesn't taste as good. Also the crust is nice and crunchy, but the cookie center has more of a cake kind of consistency... But now that I have crossed my first hurdle, I have promised myself that I'll bake as often as I can and hopefully the results will get better! So if any of you have suggestion on how I can better my baking skills, or if you have recipes or links for beginners like me, please do drop in a comment :)

Saturday, May 8, 2010

French Apple Pie


Ok, first up, let me confess that I have no clue what this dessert is really called! I was watching Food Paradise on Travel & Living yesterday and tuned in to see the host taking a tour of Burgundy in France. And this was a quick local dish that she showed how to make. It seemed really easy and I had 2 apples sitting in my fridge for a few days and all the ingredients in my larder, so I thought I would give it a try...

But I don't have an oven yet (but have already bought a cool Glen cooking range complete with grill and oven for the new house which should be functional by end of this month. yaaay!) So I prepared this in the microwave and was expecting it to really turn out a disaster. But it was surprisingly delicious - soft and warm on the inside, crisp on the edges like an apple pie... ummm! I think I'm going to go get myself a slice right away!

Ingredients:


Apple (Red) - 1
Flour - 1 cup
Salted Butter - 75gms
Baking Soda - 1/2 tsp
Eggs - 2
Powdered Sugar - 1/2 cup
Cinnamon Powder - 1/2 tsp
Cream - 200ml (I use Amul Fresh Cream)

Add the baking soda to the flour. Now take the butter at room temperature and slowly start mixing it into the flour till all the butter is dissolved. Add a splash of water - just enough to turn it into an easy to roll dough. With a rolling pin, roll out the dough into a smooth circle or rectangle (depending on the shape of your dish) and transfer it into the baking dish. Pat in the corners and the edges.

Core and peel the apple and cut it into thin slices. Now spread these slices evenly all over the dough in a single layer.

In a mixing bowl, break the 2 eggs, add the sugar, powdered cinnamon and the cream. Whisk it until the sugar has dissolved and the mixture is thick and creamy. Pour it on top of the sliced apples covering every inch of the baking dish.

Thats it... pop it into the oven for 30min, or microwave it at 60% power for 30min. Let it cool a little and savour it while still warm.

Though this microwave version turned out absolutely fine, I'm sure if i had made this in the oven, my apples would have been crunchier on the top and the crust would have been nicer. Currently it's a little biscuit-y... But frankly, am not complaining. Coz this has to be the simplest form of scrumptious apple pie ever!

Friday, April 16, 2010

My first attempt at baking - Chocolate Sponge Cake


I made this cake almost 2 weeks ago and sent it to Sid in Chandigarh along with the Hyderabadi Chicken Biryani, but I just did not have the time to post the recipe earlier. This was my very first attempt at baking anything and so I tried a fairly easy microwave recipe that I looked up in my Onida microwave cooking booklet. My micro is not even a convection one but this recipe proved to be really quick, easy and delicious.

Ingredients:
Flour/Maida – 1 cup
Cocoa Powder – 2 tbsp
Powdered Sugar – 1 cup
Butter – 100gms
Eggs – 2
Baking Soda – 1 tsp
Vanilla essence
Milk – 1/3rd cup

My impromptu chocolate icing:
Cadbury’s Silk – 1 bar
Milk – 5 tbsp

Sieve the flour with the cocoa powder and baking powder and set aside in a large vessel/bowl. In a mixing bowl beat the eggs, sugar and butter till it reaches a smooth, thick, creamy consistency. Fold in this mixture into the flour and mix slowly. Add a drop of vanilla essence. Pour this cake mixture into a greased microwave safe bowl and Auto Cook on Sponge Cake setting. If you don’t have that option in your microwave, then just nuke it on high power for 5-6min. Put a knife in through the centre of the cake and if it comes out clean without any dough sticking to it, the cake is done. Once the cake has cooled down, slide a knife around the edges and overturn the bowl into a plate.

Once the cake was out on a plate, I realized it still had an eggy smell which Sid is so not fond of. So I rummaged around in the fridge, found a standard sized bar of Cadbury’s Silk Dairy Milk Chocolate, broke it into pieces, added a little milk and zapped the whole thing in the microwave for 1 min. I poured the ensuing chocolate syrup on top of the cake and spread it evenly. Refrigerate till the chocolate hardens and sets, and cut into slices.

Heat it before serving for that gooey chocolate covered sponge cake effect.

Sid, who is not really a cakes and pastries person, claims he really liked this! J And G swears she polished off more than half the cake by herself. So this has given me the confidence to bake more stuff. So even though I don’t have an oven, now with our new house under renovation, have decided to buy a cooking range complete with in-built grill and oven :) Hopefully this blog will see many more cakes and baked goodies in the future!